What is a DMM, Digital Multimeter?
A digital multimeter, DMM is a test instrument used to measure electrical values including voltage, current and resistance, although modern DMMs often make many more measurements.
Multimeter Tutorial Includes:
Test meter basics
Analogue multimeter
How does an analogue multimeter work
DMM digital multimeter
How a DMM works
DMM accuracy & resolution
DMM CAT ratings
How to buy best digital multimeter
Cheap vs expensive DMM
How to use a multimeter
Voltage measurement
Current measurements
Resistance measurements
Diode & transistor test
Fault finding transistor circuits
Analogue vs Digital multimeter
Test leads & probes
A digital multimeter or DMM is one of the most widely used pieces of test equipment today - they are almost invaluable in any electronics laboratory, for the home, hobbyist and professional electronics engineer.
The cost of digital multimeters varies considerably. Some of these test instruments can be bought very cheaply and provide very good service and they are surprisingly accurate - far more accurate than is needed for most measurements, but top range multimeters are also available with very high specifications for use in the most demanding applications.
... apart from amps, volts, and ohms, many DMMs can measure parameters including frequency, capacitance, continuity, and temperature....
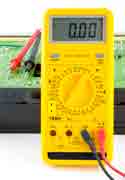
Originally analogue multimeters were used, but these are only rarely used these days as digital technology has made digital multimeters cheaper, far more accurate and capable of providing many more capabilities beyond just measuring current, voltage and resistance.
Digital multimeters or DMMs can measure a variety of different parameters within an electrical circuit - today's DMMs can have huge levels of functionality.
The basic DMMs can measure amps, volts and ohms, as the older analogue meters did. This makes them very useful for measuring just these parameters.
However, with the ease of incorporating further functionality into an integrated circuit, many digital multimeters are able to make a number of other measurements as well.
Many of them include functions enabling measurement of capacitance, frequency, continuity (with a buzzer to facilitate easy measurements when looking at the circuit board), temperature, transistor functionality, and often a number of other measurements as well.
What is a digital multimeter?
For many years, analogue multimeters were used. As modern day integrated circuits were not available, these test instruments paved the way for the later digital versions.
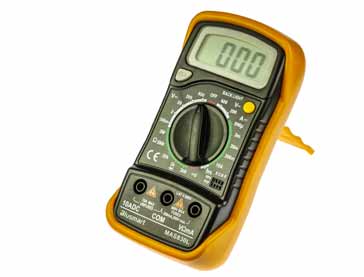
The analogue multimeters were able to measure only amps volts and ohms. However the introduction of integrated circuit technology and other technologies enabled analogue to digital converters to be made along with deploys like liquid crystal displays.
This enabled test instruments to be made that could measure the basic measurements of amps volts and ohms to be made digitally.
In addition to this, it was possible to add in additional measurements at very little cost, making these test instruments far more versatile than the old analogue counterparts.
The basic block diagram of a typical digital multimeter is given in the diagram below. Although different DMMs will use different circuits, the same basic techniques tend to be used from one test instrument to the next.

The concept used within the analogue to digital conversion is called a successive approximation register. As the name implies, the successive approximation register ADC operates by successively homing in on the value of the incoming voltage.
Typical DMM controls and connections
The interfaces on the front of a digital multimeter are normally very straightforward. The basic digital multimeter will typically have a switch, display, and the connections for the test probes.
The main connection on a typical digital multimeter are given in the image and description below, but obviously the exact layout and capabilities will be dependent upon the particular test instrument in use.
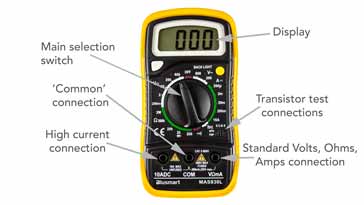
- Display The display on a DMM is normally easy to see and read. Most have four digits, the first of which can often only be either a 0 or 1, and there will normally be a + / - indication as well. There may also be a few other smaller indicators such as AC / DC etc dependent upon the model of DMM
- Main connections There will be some main connections for the probes to connect to. Although only two are needed at any one time, there may be three or four. Typically these may be:
- Common - for use with all measurements and this will take the negative or black lead and probe
- Volts, ohms, frequency - this connection is used for most measurements and will take the positive or red lead and probe.
- Amps and milliamps - this connection is used for the current measurements and will again take the red lead and probe.
- High current - there is often a separate connection for high current measurements. Care must be taken to use this rather than the low current connection if high levels of current are anticipated
- Main switch There will usually be a single main rotary switch to select the type of measurement to be made and the range that is needed.
- Additional connections There may be additional connections for other measurements such as temperature where a thermocouple will need its own connections. Some meters are also able to measure the gain of transistors, and these will require separate connections on the meter.
- Additional buttons and switches There will be a few additional buttons and switches. The main one will obviously be the on/off button. Other functions including items such as peak hold may also be available
The switches and controls are normally set out with the main range switch occupying the central position within the multimeter panel. The display typically occupies a position at the top of the instrument so that it is easy to see and it is free from being obscured by leads and also it can still be seen if the switch is being operated.
Any additional switches are typically located around the main switch where they can be reached very easily.
The connections for the test leads are normally located at the bottom of the front panel of the meter. In this way that can be reached easily, but the leads do not obstruct the operation and view of the switches and the display.
How to use a digital multimeter
The operation of a DMM itself is normally very straightforward. With a knowledge of how to make voltage, current and resistance measurements it is then a matter of putting the multimeter to use.
If the meter is new then it will obviously be necessary to install a battery to power it. This is normally simple and straightforward and details can be found in the operating instructions for the DMM.
When using the meter it is possible to follow a number of simple steps:
- Turn the meter on
- Insert the probes into the correct connections - this is required because there may be a number of different connections that can be used.
- Set switch to the correct measurement type and range for the measurement to be made. When selecting the range, ensure that the maximum range is above that anticipated. The range on the DMM can then be reduced as necessary. However by selecting a range that is too high, it prevents the meter being overloaded.
- Optimise the range for the best reading. If possible enable all the leading digits to not read zero, and in this way the greatest number of significant digits can be read.
- Once the reading is complete, it is a wise precaution to place the probes into the voltage measurement sockets and turn the range to maximum voltage. In this way if the meter is accidentally connected without thought for the range used, there is little chance of damage to the meter. This may not be true if it left set for a current reading, and the meter is accidentally connected across a high voltage point!
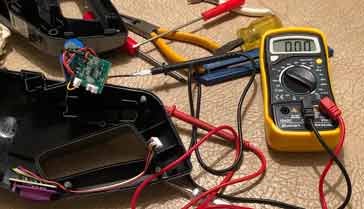
When making any measurements it is necessary to be careful not to let the test probes slip as it might be possible to short connections on the circuit under test. In extreme circumstances this could cause a power short circuit, or damage the board.
Normally, when probing board, connections are sufficiently far apart for this not to be a problem, but care should be taken particularly when dealing with high voltage and high current circuits.
DMM overall accuracy
There are a number of elements that contribute to what may loosely be termed accuracy. Two of the major constituents are the resolution and the actual accuracy of the measurement system
- Resolution The resolution of a DMM is often specified in the number of digits. DMMs will be specified in terms of the number of digits in the display. Typically this will be a number consisting of an integer and a half, e.g. 3 1/2 digits. By convention a half digit can display either a zero or 1. This a three and a half digit meter could display up to 1999. Sometimes a three quarters digit may be used. This can display a number higher than one, but less than nine.
- Accuracy The accuracy of the meter is different to the display resolution. This represents the uncertainty of the reading due to inaccuracies in the DMM.
Although the accuracy of a digital multimeter will be much greater than that of a analogue multimeter, it helps to understand the difference between the accuracy and resolution.
It is also necessary to understand the difference between them to understand the overall accuracy of any measurements that are made.
Digital multimeters are very versatile test instruments. With the development of digital technology, many of these test meters are able to provide additional measurements beyond those of the basic voltage current and resistance. When buying a digital multimeter it is worth selecting one that can measure parameters that could be envisaged to be needed.
Digital multimeters are able to make very accurate measurements and display them so that they are easily read.
 Written by Ian Poole .
Experienced electronics engineer and author.
More Test Topics:
Data network analyzer
Digital Multimeter
Frequency counter
Oscilloscope
Signal generators
Spectrum analyzer
LCR meter
Dip meter, GDO
Logic analyzer
RF power meter
RF signal generator
Logic probe
PAT testing & testers
Time domain reflectometer
Vector network analyzer
PXI
GPIB
Boundary scan / JTAG
Data acquisition
Return to Test menu . . .

