How a Digital Multimeter Works
Understanding how a digital multimeter works helps you make the best of its advantages and minimise the impact of its disadvantages.
Multimeter Tutorial Includes:
Test meter basics
Analogue multimeter
How does an analogue multimeter work
DMM digital multimeter
How a DMM works
DMM accuracy & resolution
DMM CAT ratings
How to buy best digital multimeter
Cheap vs expensive DMM
How to use a multimeter
Voltage measurement
Current measurements
Resistance measurements
Diode & transistor test
Fault finding transistor circuits
Analogue vs Digital multimeter
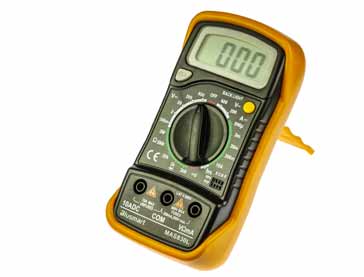
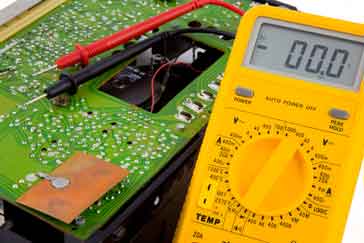
When using a digital multimeter, it helps to have an understanding of how the test instrument works. In this way the best use can be made of it - understanding how the DMM works, enables the best settings to be selected, etc.
In view of the digital technology used rather than analogue dials, the DMM works in a very different way to the older analogue multimeters. The DMM uses analogue to digital converter technology and also they are able to provide many more measurement capabilities because adding extra measurements into the basic IC does not add significantly to the cost.
The basic measurements made by any multimeter are amps, volts and ohms (resistance) and many digital multimeters provide a host of other measurements including capacitance, transistor hfe, continuity buzzer, temperature, etc dependent upon the particular test instrument.

How a DMM works - fundamentals
When looking at how a digital multimeter works, it is necessary to understand the core technologies that are generally used.
For the DMM, one of the key processes involved in this is that of the analogue to digital conversion.
There are many forms of analogue to digital converter, ADC. However the one that is most widely used in digital multimeters, DMMs is known as the successive approximation register or SAR.
Some SAR ADCs may only have resolution levels of 12 bits, but those used in test equipment including DMMs generally have 16 bits or possibly more dependent upon the application.
Typically for DMMs resolution levels of 16 bits are generally used, where high levels of speed are not normally required. Typically for most bench or general test instruments, measurements only need to be taken at a maximum rate of a few a second, possible ten a second.

As the name implies, the successive approximation register ADC operates by successively homing in on the value of the incoming voltage.
The first stage of the process is for the sample and hold circuit to sample the voltage at the input of the DMM and then to hold it steady.
With a steady input voltage the register starts at half its full scale value. This would typically require the most significant bit, MSB set to "1" and all the remaining ones set to "0". Assuming that the input voltage could be anywhere in the range, the mid-range means that the ADC is set in the middle of the range and this provides a faster settling time. As it only has to move a maximum of the full scale rather than possibly 100%.
To see how it works take the simple example of an 4-bit SAR. Its output will start at 1000. If the voltage is less than half the maximum capability the comparator output will be low and that will force the register to a level of 0100. If the voltage is above this, the register will move to 0110, and so forth until it homes in on the nearest value.
It can be seen that SAR converters, need one approximating cycle for each output bit, i.e. an n-bit ADC will require n cycles.
DMM operation
Although the analogue to digital converter forms the key element within the test instrument, in order to fully understand how a digital multimeter works, it is necessary to look at some of the other functions around the analogue to digital converter, ADC.
Although the ADC will take very many samples the overall digital multimeter will not display or return every sample taken. Instead the samples are buffered and 'averaged' to achieve high accuracy and resolution.
Buffering and 'averaging' will overcome the effects of small variations such as noise, etc., noise created by the analogue first stages of the DMM being an important factor that needs to be overcome to achieve the highest accuracy.

The basic measurement that is made is that of voltage - the analogue to digital converter converts an analogue voltage into a digital format so that it can be processed by the processing circuitry.
In order to measure large voltages, potential divider networks can be made on the input of the ADC. This can precondition the input voltage to fall within the range of the ADC.
Similarly current measurements can be made by monitoring the voltage across a known resistor.
In this way the DMM uses very similar measurement techniques to that of the analogue meter where series resistors and parallel shunts were used.
To measure resistance requires a slightly different approach, often measuring the voltage across the resistor via a known resistance from a stabilised voltage in the meter.

One of the other elements of the digital multimeter is the display. Rather than using an analogue panel meter, digital multimeters use a numeric display. Typically this is a liquid crystal display, so be careful when using it outside if it gets cold as liquid crystal displays do not function below about 0°C.
Typically the displays are relatively large and it is possible to see all t he digits quite easily. In the dark the digits may be more difficult to see, but some DMMs have backlights to provide additional light for these circumstances.
Measurement time
One of the key areas of understanding how a digital multimeter works is related to the measurement time. Apart from the basic measurement there are a number of other functions that are required and these all take a little time. Accordingly the measurement time of a digital multimeter, DMM, may not always to be appear straightforward.
It is always best to give the DMM time to settle, although in most cases the speed at which measurements are taken is very fast and will not bother the manual user. Where DMMs that have computer control are used, a little additional time may need to be added to the programme for this. These automated DMMs tend to be ones in bench style boxes rather than the hand held style manual ones.
The overall measurement time for a DMM is made up from several phases where different activities occur:
Switch time: The switch time is the time required for the instrument to settle after the input has been switched. This includes the time to settle after a measurement type has been changed, e.g. from voltage to resistance, etc. It also includes time to settle after the range has been changed. If auto-ranging is included the meter will need to settle if a range change is required.
Settling time: Once the value to be measured has been applied to the input, a certain time will be required for it to settle. This will overcome any input capacitance levels when high impedance tests are made, or generally for the circuit and instrument to settle.
Often the meter will be seen to home in on the final reading. This is not unusual, and time should be given for the meter to settle and the steady reading taken.
Signal measurement time: This is the basic time required to make the measurement itself. For AC measurements, the frequency of operation must be taken into account because the minimum signal measurement time is based on the minimum frequency required of the measurement. For example, for a minimum frequency of 50 Hz, an aperture of four time the period is required, i.e. 80 ms for a 50Hz signal, or 67ms for a 60Hz signal, etc.
Auto-zero time: Some digital meters, typically the higher end DMMs have a capability known as auto-ranging. When used in this mode, it is only necessary to select the type of measurement to be made: DC amps, AC amps; DC voltage; AC voltage etc. Beyond this, the meter will set the range itself according to the input voltage.
When auto-range is selected, or range changes are made, it is necessary to zero the meter to ensure accuracy. Once the correct range is selected, the auto-zero is performance for that range. Although typically quite short, it may be noticed on some occasions.
ADC calibration time: In some DMMs a calibration is periodically performed. This must be accounted for, especially where measurements are taken under automatic or computer control.
The concept of the way the digital multimeter works is relatively straightforward, but it can be understood that measuring varying waveforms or intermittent voltages can give unusual results. Also it is important to select the right setting for the time that the measurement can be taken. Understanding how the digital multimeter works enables more informed decisions like these and others to be made when using a DMM.
 Written by Ian Poole .
Experienced electronics engineer and author.
More Test Topics:
Data network analyzer
Digital Multimeter
Frequency counter
Oscilloscope
Signal generators
Spectrum analyzer
LCR meter
Dip meter, GDO
Logic analyzer
RF power meter
RF signal generator
Logic probe
PAT testing & testers
Time domain reflectometer
Vector network analyzer
PXI
GPIB
Boundary scan / JTAG
Data acquisition
Return to Test menu . . .


